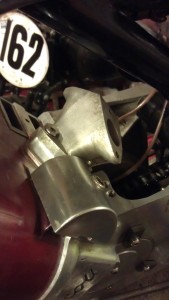
The rebuild of the Super squirrel racer is in its final phases.. and so it has to be as it’s entered for the Beezumph at Cadwell park on the 11th /12th July. I need to do a piece on the final assembly and some of the things I’ve experimented with.
I’ll default to the single carburettor that I know works if time really dissapears but I’d really like to try and get the twin carb set up finished and ready as it really might fly with a bit of extra gas coming in. 
I’ve had a twin carb manifold for a few years which was made by Eddie Shermer. It splits either side of the single tube and gives you the advantage of standard two stud carb mounting rather than the unique Scott three bolt pattern. I have been intending to use the two Amal 289 carbs that I have previously used, albeit briefly, with this set-up. Although it seemed to go well at the time there was insufficient opportunity to really test its performance. That was with petrol, not methanol so a direct comparison is not possible. I have had a feeling that the 289’s will be too big though.
A couple of years ago, when I first set the bike up on methanol I approached various people for advice. Roger Cramp of Velocette racing fame had built and developed two strokes to run on methanol and he kindly gave me the benefit of his experience about carburation. One of the things he said was that with methanol he’d found it very important to make sure that you had sufficient gas-speed over the emulsion tube to ensure that you had adequate atomisation, and he found that he’d reduced carb throat size to achieve better results. I imagine this principle applies to any fuel, but methanol is more reluctant than petrol to diffuse it seems. My single carburettor that sits behind the downtube is quite small and it works perfectly with good clean pick up throughout the range and it’s difficult to imagine that the pick up could be better. I don’t want to lose tractability so I thought I’d look at the relative areas.
The inlet port on a single cylinder measures about 61mm x 16.8mm which gives around 10.5cm². I make no apology for change in units as I use what helps me visualise better! I’ve ignored the single bridge in this port, but reason that it will effectively make the port a little smaller.
The single carb I use at the moment is an Amal 289 bored out to about 32mm. This area is 8.04cm²
The 289’s I have are about 28mm bore and this is about 6.15cm². Two of these is 12.3cm²
A 1″ 276 is about 5.06cm². Two of these is 10.12cm². This would seem to be a better match.
It seems to me that I should try to at least have the carburettor inlet area quite closely matched to the actual inlet port area and that all my work on getting more gas in is a little pointless if I don’t increase the carburettor size. I think it will be very interesting to see what two of the 276’s will be like though although it’s going to be a push to get them and do the calculations for needle and jetting modifications before the Beezumph.
The engine is now together and primary chain and ‘magneto’ belt fitted and tensioned.
Securing the engine is a procedure on my Scott as it is fitted with ‘tie-bars’ which replace the lower frame rails. We tension these before the engine bolts are finally done up to pull everything together.
Also requiring a procedure is fitting the primary chain.
The Scott uses an ‘outrigger’ final drive sprocket which is secured through slots in it’s casting to the undertray. The undertray is an aluminum casting which bolts into a Scott frame and carries the gearbox and final drive as an assembly. The gearbox itself is secured using two long studs projecting from the bottom of the gearbox and passing through slots in the undertray to allow adjustment of the primary chain. Under acceleration the outrigger tends to get dragged rearwards along it’s slots, thus wearing the ‘high gear bush) in the gearbox putting bending moments on the output shaft and also encouraging the entire gearbox rearwards also. When this happens the primary chain tightens which puts pressure on the main bearings as well as buggering the chain, wearing the drive sprocket and wasting power.
One of the ways to avoid this is to cut out a little piece of metal to very closely sit in the slot of the outrigger to prevent it being dragged rearwards. Roger did this for years. Now we have snail cams fitted to the rear undertray mounting on the drive side to wedge against the back of the outrigger.
The other part of the gearbox bolting procedure is to make sure that after everything is locked in position, we make sure that the backlash in the adjuster for the gearbox position is taken out so that it also is playing a part in making sure that the gearbox is not pulled backwards. I then wire lock this adjuster nut in position. If this is not done, the gearbox will be pulled. The Scott 3 speed gearbox is a rugged device, but simply ‘doing the bolts up’ is not enough. These two procedures make sure that the gearbox stays where it should.